

Receiving satellite channels successfully depends on several factors that work together to deliver a stable television signal. While the frequency is one of the most important details, the condition of the dish, the quality of the connections, and the receiver configuration can also have a direct impact on reception.
Many reception problems can be resolved by checking the available settings and performing a proper channel search. Understanding how these settings work makes it easier to identify the source of a problem and apply the appropriate adjustment without unnecessary changes.
This guide focuses on the most important aspects of satellite channel reception and provides helpful information that can assist viewers in updating their channel lists, improving signal stability, and completing the tuning process correctly.
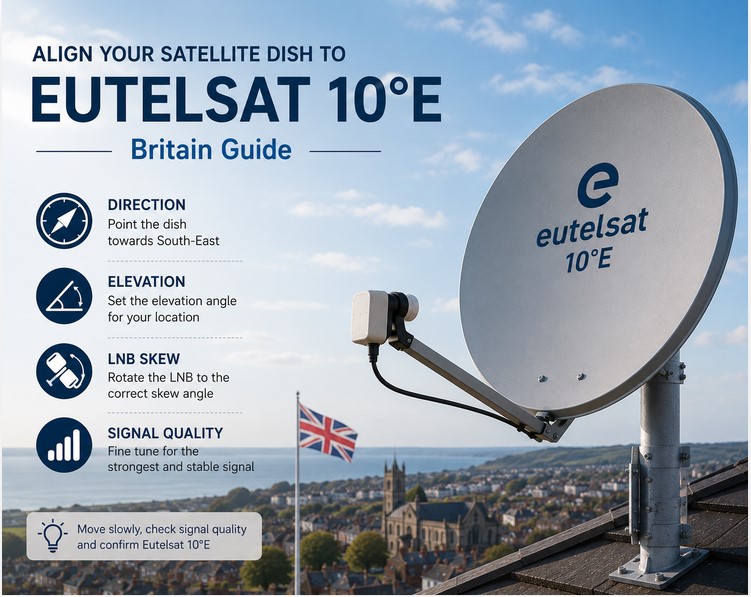
The Eutelsat 10°E satellite position is an important orbital location for a variety of tv, transmit and data services. Aligning a satellite antenna to this position in Britain requires patience, suitable equipment and accurate adjustment of the antenna direction, elevation and LNB position.
Because satellite positions can be relatively close together, finding a transmission is not always enough. A antenna may lock onto a nearby satellite while still showing a strong transmission reading. For this reason, successful configuration requires careful fine-tuning and confirmation that you have found the correct satellite.
This step-by-step guide explains how to align a satellite antenna to Eutelsat 10°E in Britain and improve the chances of achieving the strongest possible transmission.
Step 1: Choose a Suitable Installation Location
The first step is choosing the right place for the satellite antenna.
From Britain, Eutelsat 10°E generally appears toward the south-eastern part of the sky. The antenna needs a sharp and unobstructed line of sight in that direction.
Before installing the antenna, check for:
- Tall structures.
- Trees and branches.
- Chimneys.
- Walls.
- Roof structures.
- Nearby properties.
- Other objects directly in the transmission path.
A satellite transmission can be weakened or blocked by an obstacle that appears relatively small. Trees can also become a future problem as they grow or move during windy weather.
Step 2: Install the Mounting Pole Correctly
The mounting pole must be strong and steady.
It should also be perfectly vertical.
Use a spirit level to check the pole from various sides.
This is extremely important because the elevation markings on the satellite antenna bracket are designed to work correctly when the mounting pole is vertical.
If the pole is tilted, it can make the antenna positioning process more difficult and the elevation scale less accurate.
A properly installed mounting pole makes it easier to:
- Set the correct elevation.
- Search for the satellite.
- Fine-tune the transmission.
- Keep the antenna steady.
Step 3: Understand the General Direction of Eutelsat 10°E
Although Eutelsat is located at 10° East, a antenna installed in Britain should not simply point directly east.
From most locations in Britain, the satellite generally appears toward the south-east.
The exact direction depends on your location.
The required azimuth can be various in:
- London.
- Birmingham.
- Manchester.
- Liverpool.
- Cardiff.
- Glasgow.
- Edinburgh.
- Belfast.
For accurate results, use a satellite positioning calculator or a reliable satellite finder application based on your exact location.
This will provide the approximate azimuth and elevation values needed for your configuration.
Step 4: Set the Approximate Elevation
The elevation angle determines how high above the horizon the satellite antenna should point.
The correct elevation for Eutelsat 10°E varies across Britain.
Generally, the satellite appears lower in the sky as you move farther north.
This means the elevation setting may be various in southern England compared with Scotland or northern areas.
To adjust the elevation:
- Loosen the elevation bolts slightly.
- Use the elevation scale as a starting point.
- Set the approximate elevation for your location.
- Move the antenna slowly upward or downward.
- Watch the transmission clarity reading.
Avoid making large movements.
A small adjustment can have a significant effect on transmission reception.
Step 5: Configure the Satellite Receiver
Before searching for the satellite transmission, make sure your device is configured correctly.
Typical settings may include:
- Satellite: Eutelsat 10°E
- LNB Type: Universal
- LNB Frequency: According to the installed LNB
- DiSEqC: Configured correctly if you use multiple LNBs
If you are using a multi-satellite configuration, confirm that Eutelsat 10°E is assigned to the correct DiSEqC port.
Incorrect settings can make it difficult to find or correctly identify the satellite.
Step 6: Start Searching for the Signal
After setting the approximate direction and elevation, begin searching for the satellite.
Move the antenna very slowly from left to right.
A good search method is:
- Move the antenna a very small distance.
- Stop and wait for a few seconds.
- Check the transmission clarity.
- Continue slowly.
- Stop when a transmission appears.
Do not move the antenna too quickly.
Many satellite receivers require time to refresh their transmission meters. If you move the antenna rapidly, you may pass the satellite without seeing the transmission.
Once a transmission appears, begin making smaller adjustments.
Step 7: Focus on Signal Quality
Satellite receivers often display:
- Signal Strength
- Signal Quality
Signal strength alone does not always confirm that you have found the correct satellite.
A nearby satellite can produce a strong transmission reading.
For accurate positioning, focus mainly on transmission clarity.
The correct position should provide a steady and strong clarity reading for a known Eutelsat 10°E service or transponder.
Continue fine-tuning until you find the position with the highest steady transmission clarity.
Step 8: Adjust the LNB Skew
The LNB skew is the rotation angle of the LNB.
The correct angle depends on your location in Britain.
After finding the Eutelsat 10°E transmission:
- Loosen the LNB holder slightly.
- Rotate the LNB in very small movements.
- Monitor the transmission clarity.
- Find the position that provides the best result.
- Tighten the LNB securely.
Small changes in LNB rotation can improve transmission clarity and help achieve more steady reception.
Step 9: Confirm That You Have Found Eutelsat 10°E
Before completing the configuration, confirm that the antenna is actually pointing at Eutelsat 10°E.
This is an important step because several satellites are located relatively close to this position.
You can confirm the correct satellite by:
- Performing a channel search.
- Checking the detected services.
- Confirming the satellite name displayed by the device.
- Verifying a known active service or transponder.
If the device finds unexpected channels, the antenna may be pointing at another satellite position.
Return to the positioning process and make small adjustments if necessary.
Step 10: Fine-Tune the Dish
Once you have confirmed Eutelsat 10°E, begin the final fine-tuning process.
Adjust:
- The horizontal antenna direction.
- The elevation angle.
- The LNB skew.
Make only one adjustment at a time.
If moving the antenna slightly improves transmission clarity, continue until the clarity begins to fall. Then return to the strongest point.
The aim is to achieve the highest possible steady transmission rather than simply finding any transmission.
Step 11: Tighten All Mounting Bolts Carefully
After reaching the best possible transmission clarity, tighten all mounting bolts gradually.
Do not tighten everything immediately.
Securing a bolt can slightly move the antenna and reduce transmission clarity.
After tightening each bolt:
- Check the transmission clarity again.
- Confirm that the antenna has not moved.
- Check the LNB holder.
- Inspect the wire connections.
Once everything is secure, perform a final transmission check.
Common Problems When Aligning Eutelsat 10°E
No Signal
If the device shows no transmission:
- Check the satellite wire.
- Inspect the LNB.
- Confirm the device settings.
- Recheck the antenna direction.
- Check the elevation.
- Make sure the mounting pole is vertical.
- Inspect the transmission path for obstacles.
Strong Signal but the Wrong Channels
This can happen when the antenna is pointing at a nearby satellite.
Verify the satellite by performing a channel search and checking the detected services.
Then make small adjustments to locate Eutelsat 10°E.
Weak or Unstable Signal
A weak transmission may be caused by:
- Slightly incorrect antenna positioning.
- Incorrect elevation.
- Incorrect LNB skew.
- A damaged LNB.
- Poor-clarity wire.
- Loose connectors.
- Water damage.
- Obstructions.
- Difficult weather conditions.
Careful fine-tuning can often improve reception.
Can Weather Affect Eutelsat 10°E Reception?
Heavy rain, snow and strong winds can affect satellite reception.
A properly aligned antenna provides a stronger transmission margin and can improve stability during poor weather.
If the antenna is only receiving a weak transmission, bad weather may cause picture freezing or temporary transmission loss.
This is why accurate positioning is important.
Tips for the Best Possible Signal
To improve your chances of receiving a strong and steady Eutelsat 10°E transmission:
- Install the antenna where there is a sharp line of sight.
- Make sure the mounting pole is perfectly vertical.
- Use a suitable satellite antenna.
- Use a good-clarity LNB.
- Install reliable satellite wire.
- Protect outdoor wire connections from water.
- Avoid unnecessary wire joins.
- Move the antenna slowly during positioning.
- Focus on transmission clarity.
- Adjust the LNB skew carefully.
- Recheck the transmission after tightening the antenna.
Best Mobile Apps for Tracking Satellites
- Satellite tracking apps can help identify orbital positions and calculate dish pointing angles.
- Look for applications that provide azimuth, elevation, and LNB skew information.
- Some tools include satellite databases and coverage information for easier planning.
- Use current satellite data because channel and transmission details can change over time.